Getting Here
95 Main Street
Durham, NH 03824
United States
How to Reserve a Registrar Owned Classroom
This room is under the control of the University Registrar's Office. To request reservation of this classroom:
Fill out a Reservation Request Form
HDMI Connection
- Make sure your device is powered on and awake.
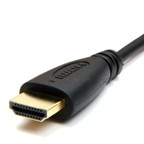
- Connect your device using the supplied HDMI cable.
- If your device requires a display adapter, connect adapter to cable first, then connect adapter to your device.
- If necessary, select your desired source connection on the AV Touch Panel.

AirMedia Wireless Presentation
To present wirelessly from your device:
- Make sure your device is powered on, awake, connected to ‘eduroam’ Wi-Fi, and Bluetooth is enabled.
- Select the AirMedia source icon on the audiovisual touch panel and follow the projected instructions.
For more information, follow the training guides available on the AirMedia Guides and Software Downloads Knowledge Base Article.

Lecture Capture
The installed camera(s) and microphone(s) in this room can be used by Kaltura lecture capture, Teams, Zoom, and other recording or videoconferencing applications. Use the provided USB cable to connect your device to utilize the installed lecture capture equipment.
Use the link below to access training materials for these systems:
iClicker Base Station Hardware
This room includes a physical iClicker base station, to be used during classes where the instructor or students need to use physical iClicker remotes.
- Connect the iClicker-labeled USB cable to either your laptop, installed PC USB Hub, or installed Mac USB Hub.
- Launch iClicker software. If necessary, input base station frequency inside iClicker Course Settings.
- For more iClicker information, view the UNH Knowledgebase Articles
- To request iClicker training please fill out a UNH Documentation & Training request Form
Note: iClicker Cloud does not require physical remotes or the base station to be used. For information about iClicker Cloud, view the UNH iClicker Cloud Knowledgebase Article.
If necessary, input base station frequency "D D" inside iClicker Course Settings.
Presenting from a Laptop Computer in a Classroom or Learning Space
- If your device requires a display adapter to connect to the provided HDMI or USB-C cable, connect the cable to the adapter first, then connect the adapter to your device.
- If your system is powered on and awake, the system should automatically start displaying your laptop.
- Note: If you need a USB-C to HDMI adapter, we have thoroughly tested and recommend the Anker 5-in-1 USB-C adapter, available on Amazon and other vendors.
Amazon Link
- Note: If you need a USB-C to HDMI adapter, we have thoroughly tested and recommend the Anker 5-in-1 USB-C adapter, available on Amazon and other vendors.
- If the system does not auto-start, you may need to select the Laptop, HDMI or USB-C source icon on the AV touch panel.
- After the projector or display has powered on, the computer's image should display on the projection screen.
- If the projection image is not displaying correctly or if the sound is not coming through the room speakers, see the troubleshooting sections below.
For more information and detailed Mac and Windows troubleshooting, visit the related Knowledge Base Article.
Classroom Training, Laptop Tips, and Advanced Troubleshooting
For laptop tips and troubleshooting:
Laptop Troubleshooting Knowledge Base Article
Need assistance or want to schedule a one-on-one AV training session? Call the AV Services Hotline at Ext. 2467 (603-862-2467) at any time.
- Suitable for Active Learning
- Capacity: 40
- AirMedia Wireless Presentation
- Audience Facing Camera
- Ceiling Mounted Microphones
- HDMI Connection
- iClicker Supported
- Instructor Facing Camera
- Sound System
- Touch Panel Control System
- Touch Panel Lighting Controls
- Video/Data Projector
- Wall Mounted Flat Panel Monitor
- Whiteboard
- Zoom/Lecture Capture


